
How to filter reports by date range
Updated 10 months ago
Browse All
Date range filtering allows you to narrow down your reports to specific time periods, making it easy to analyze activity for particular months, quarters, or custom date ranges.
Prerequisites
- Access to the Reports section in your account
- At least one completed activity or session in your account
Steps
Navigate to your desired report
From the main menu, click on Reports to see available report types. Select the report you want to filter by clicking View (for example, Impact Report, Safeguarding Report, or User Report). The report will load showing data for the current month by default.
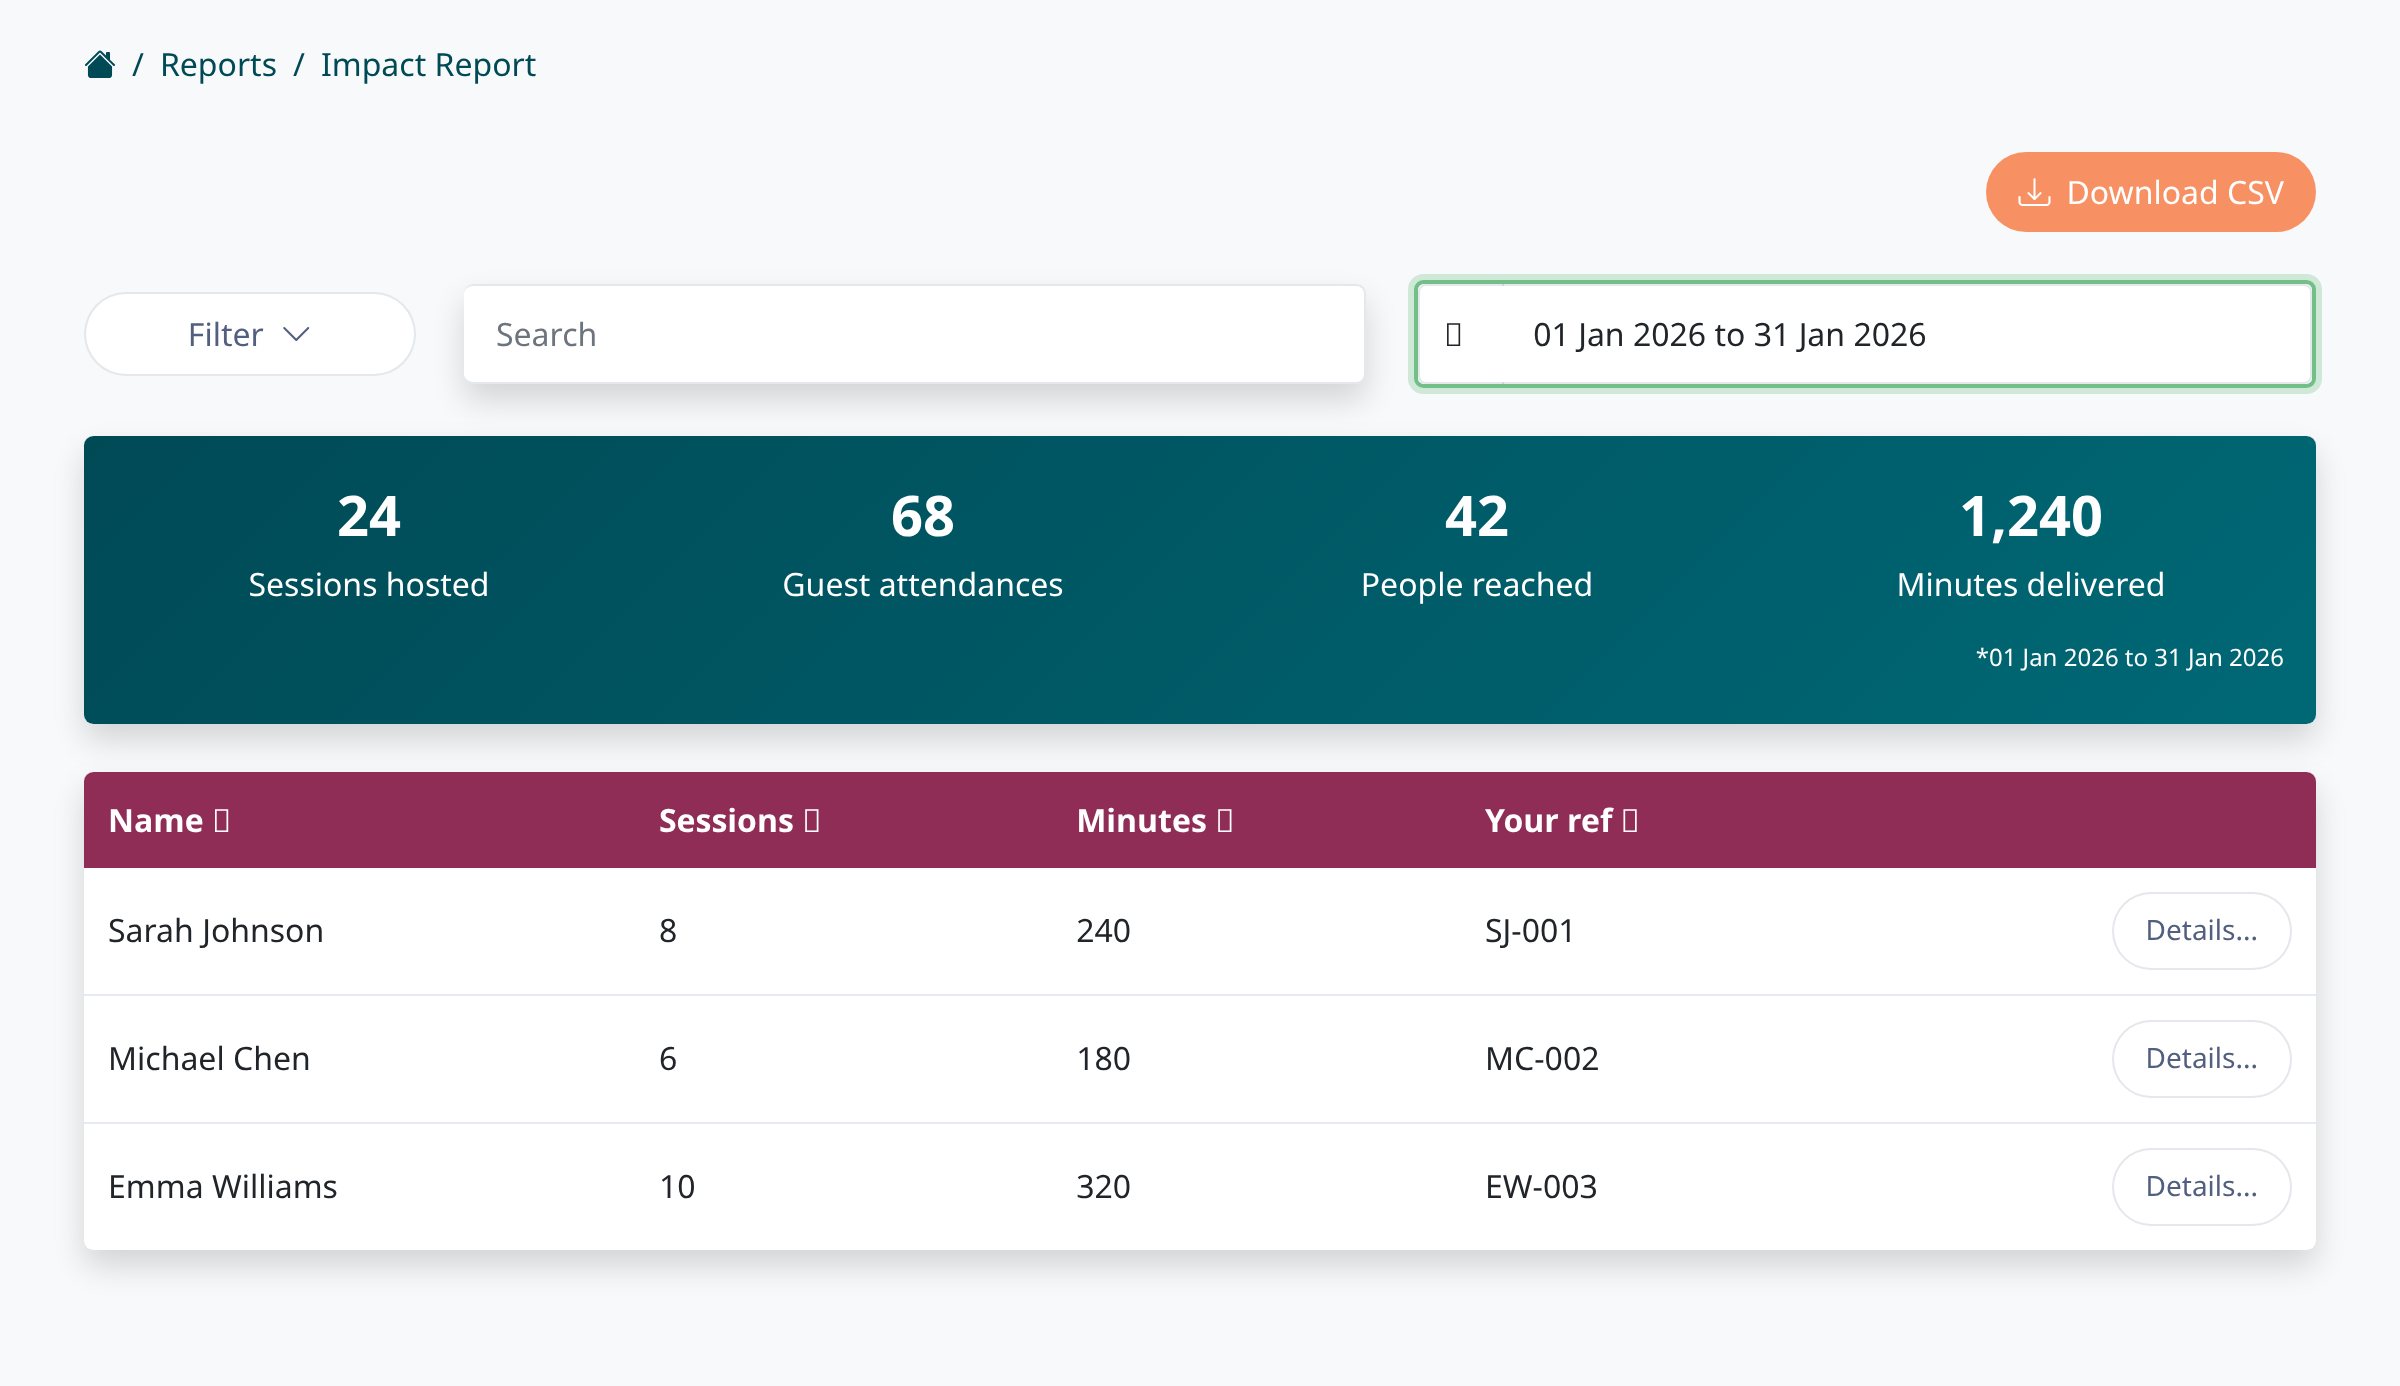
Click on the date range picker
Look for the date range field near the top of the report page. It displays a calendar icon and shows the currently selected date range (such as '01 Jan 2026 to 31 Jan 2026'). Click on this field to open the calendar date picker.
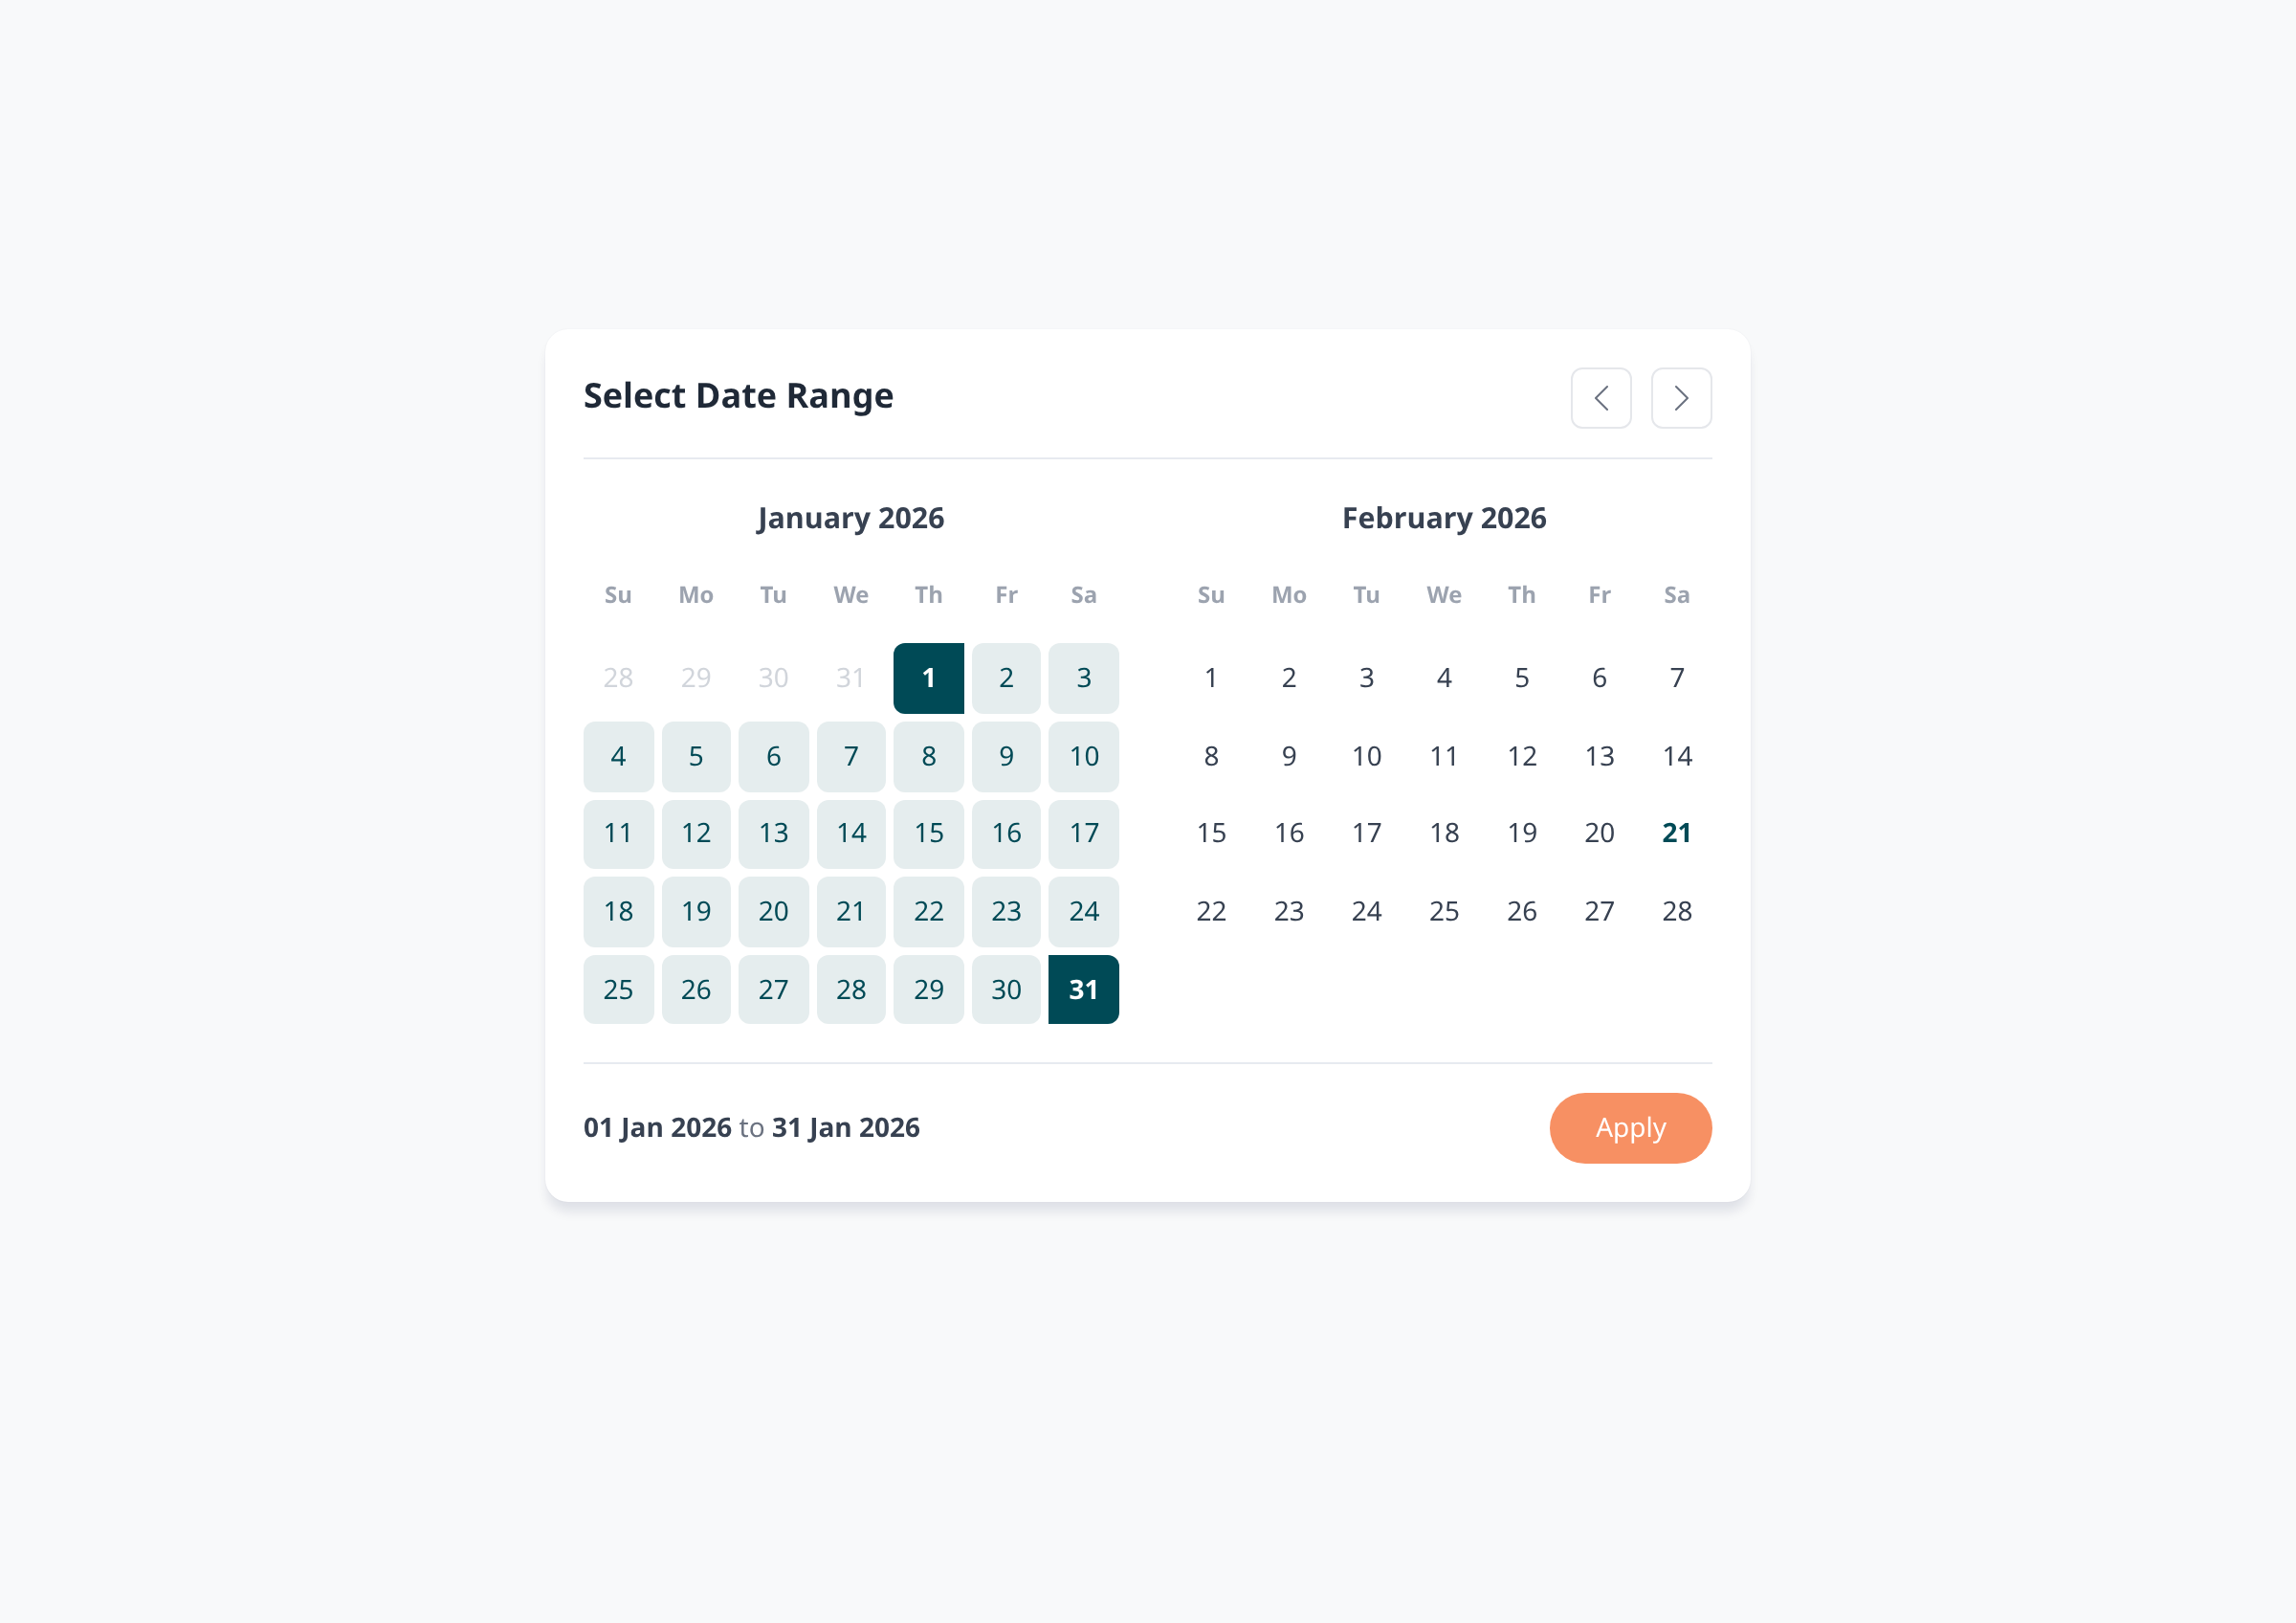
Select your start and end dates
The calendar picker displays two months side by side for easy selection. Click on your desired start date in the left calendar, then click on your end date in the right calendar. The selected range will be highlighted in blue to show which dates are included. Use the arrow buttons at the top to navigate to different months if needed. The selected date range will be displayed at the bottom of the calendar popup.
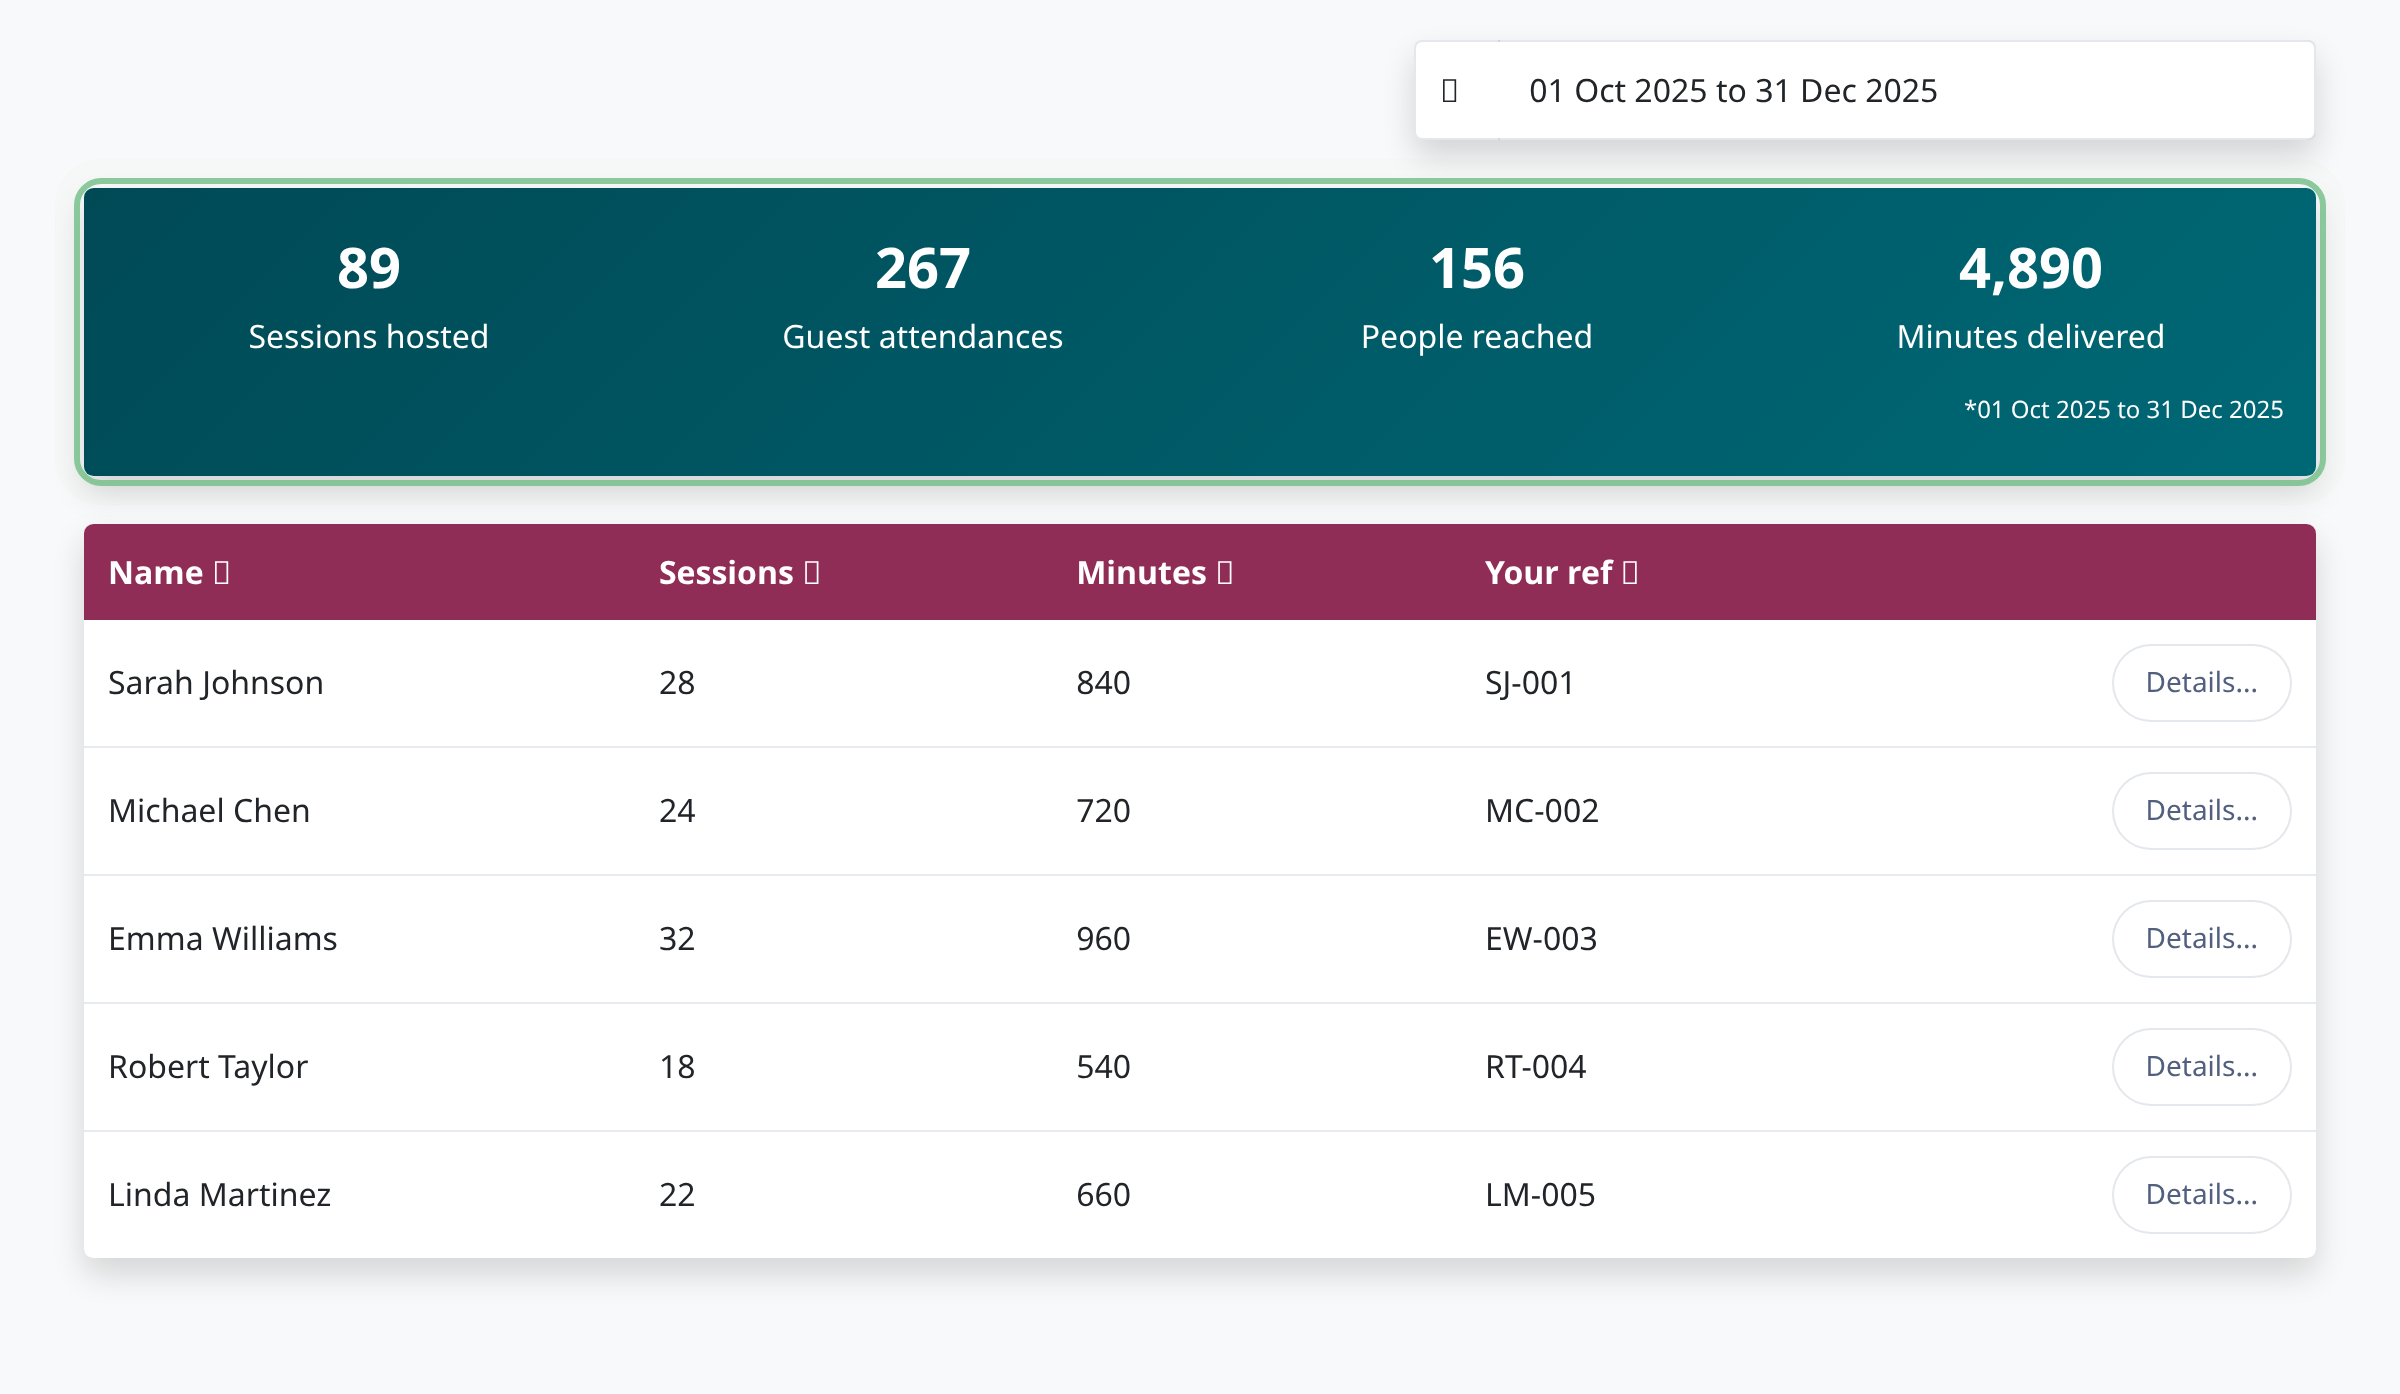
Apply the date range
Once you've selected both the start and end dates, click the 'Apply' button at the bottom of the calendar popup. The report will automatically reload with data filtered to your selected date range.
Review the updated report
The report metrics and table will refresh to show only the data from your selected date range. You'll see the date range reflected at the bottom of the summary card (for example, '*01 Oct 2025 to 31 Dec 2025'). All metrics including sessions hosted, guest attendances, people reached, and minutes delivered will update to reflect only the activities within your chosen period.
Tips
- The date picker defaults to the current month, making it quick to generate monthly reports without manual selection.
- You can select date ranges spanning multiple months by choosing a start date in one month and an end date in another - perfect for quarterly or annual reports.
- After filtering by date, you can download the filtered data as a CSV file by clicking the 'Download CSV' button at the top of the report.
Summary
Date range filtering gives you the flexibility to analyze your activity data for any time period you need. Combined with other filters like activity type (groups, befriending), you can generate precisely targeted reports for stakeholder presentations, quarterly reviews, or monitoring specific programs.
Was this article helpful?
Generated automatically by supportpages.io — AI knowledge base software for SaaS teams.
Have a question?
Search our articles, or ask and get an answer straight away.